Origins of the Triangular Grid System
By Leonard Pickel
Originally published in Haunted Attraction Magazine
History of the Triangular Grid
In 1981, the Dallas Chapter of the March of Dimes borrowed an idea for their annual Haunted House from the San Antonio Chapter. Until this time, walls had been framed out and skinned like you would a real house, which meant that the lumber had to be dismantled at the end of the season and the construction started from scratch the next year. These 4’ by 8’ by 4” thick wall panels could be arranged on a 4’ by 4’ square grid to create the patron walkway, and each section could be stored intact and re-assembled the following year, a huge savings in time and labor. Fresh out of college, Leonard Pickel was a new volunteer on this event, in charge of building an attic room for the attraction. Following that season, Pickel was made chairman for the all-volunteer fundraiser.
Even back in the early 1980’s, finding a location for a Haunted Attraction was a difficult proposition. So difficult that, in 1982, the Dallas March of Dimes Chapter borrowed another idea from the San Antonio March of Dimes, and decided to house the Haunt in a pole tent rather than warehouse space as had been used previously.
These two innovations not only made the development of the Triangular Grid System possible, but it also made it necessary. Chairman, Pickel was saddled with the task of designing a free standing Haunted Attraction in a tent for October of 1982. “They’re first question to me was, ‘How big of a tent do we need?” recalls Pickel, “but before I could answer that question, I had to design the attraction.” Pickel had designed, built and operated Haunted Houses as a college dorm fundraiser since 1976, graduating in 1980 from Texas A&M University with a Bachelor’s Degree in Architectural Design. His previous Haunt designs had been in existing buildings cut up by dorm room doors, windows and large columns. The March of Dimes Haunt would be Pickel’s first design that would not be hampered by existing walls, and he knew just where to start.
Architectural Design
“I learned in college that an Architect designs a building or space from the inside out,” explains Pickel, “the first thing they want to know is how big your furniture is.” The furniture is arranged to scale on a blank sheet so that it “functions” with the other furniture and there is room for the users of the space to use the furniture. It is only after the furniture (or the function) of the space is perfect that the walls and doors of the room are located.
This works well unless there is no clear use for the space, or if the space will have different uses, like a museum or art gallery. One design concept for designing an interesting space or building that has no clear function is called “Field Theory,” which uses a random “grid” pattern, usually made up of rotated squares of different sizes, as an underlayment guide for wall placement.
The Triangular Grid
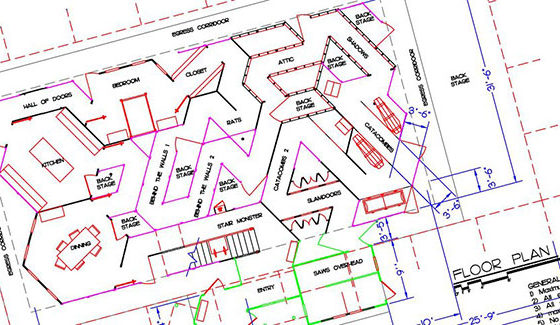
Pickel knew that this Haunt design would have to be free standing, as the tent could not help hold up the wall panels, and it would have to get maximum patron walkway for the size of the tent. He knew that a triangle is a stronger shape than an un-braced square, and that one way to design a space was on a grid. “I had just graduated,” recalls Pickel, “and I had all these newly discovered ideas swimming around in my brain bumping into each other.” When Pickel had finished his design, the attraction was an 8 room, 40’ by 60’ Haunt, with walls laid out on an equilateral triangular grid pattern. The Triangular Grid System was born!
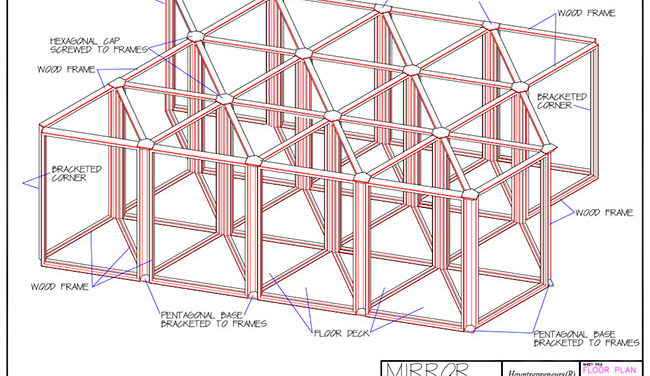
The first Triangular Grid Haunted Attraction was held together with 5″ lengths of plumbing strap nailed to each panel with roofing nails and the bracing was 2×4’s duplex nailed across the tops of the panels. The bracing was placed so that it completes the grid, creating a solid truss across the attraction panels. This experimental panel system was very solid and free standing even without securing the panels to the floor. However it had its problems. From the beginning, the thickness of the existing panels was a problem. “In that first layout I had added extra space into the grid to compensate for the 4” panel thickness in the corners,” recalls Pickel, “but when there was 3 or 4 panels in a straight line, the wall ended up too short. The large gaps where the thick panels came together at an angle were also looked like mistakes.
In 1983, Pickel fixed these problems by rebuilding the panels and lying 2x lumber flat in the 1 1/2” dimension, and going to a true 4’ by 4’ by 4’ triangular grid. This decreased the size of the gaps in the walls and made a line of panels more likely too long, rather than short. Still not a perfect solution; the 2” walls have to be “cheated” in places to make the system work. Eventually, screws replaced nails, the plumbing strap was replaced with A21 Simpson Strong Tie brackets and the 2×4 bracing was replaced by 1×4. Carpet was later added under the panels to help hold them in place and according to Pickel “because parking lot stripes in a Victorian living room is just wrong!”
Advantages and Disadvantages
The advantage of the thinner wall panel was it stored in half the space of the thicker panel. The thinner panel is easier to grasp, maneuver and can be carried by a single person. Some of the panels have windows built into them; others have doors, or drop panels. The whole attraction goes together like a giant jigsaw puzzle. As the walls are assembled the attraction goes up quickly but until the walls are braced, the attraction is like a “house of cards” and whole sections of the layout can be knocked over by carelessness. However, once braced properly, the Triangular Grid System is much stronger than a square grid layout.
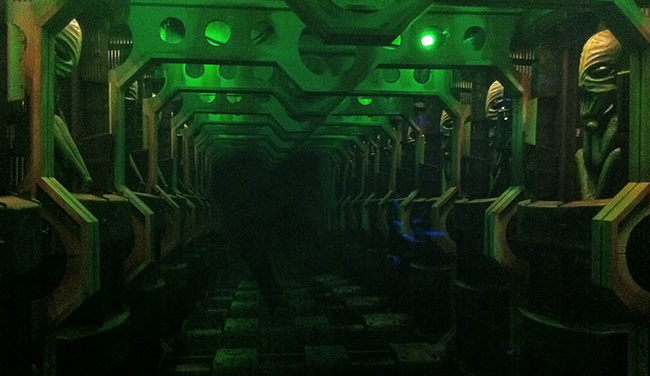
The disadvantages of the system are that the panels do not always meet in a smooth connection. If the design calls for perfect space, then a square grid may be better. The Triangular Grid rooms are also not square, the tend to be odd shaped six sided with no 90 degree corners, (although you can break the grid to create 90 corners if needed for a room design). This seems to bother some designers but could even fit the theme better than a square grid in some instances, (Victorian House, Castle/Dungeon, Alien Spaceship, Nightmare, etc.). Patrons will never notice that the walls are not at 90 degrees to each other and because of the angles, the Triangular Grid is much more disorienting than a square grid.
The Triangular Grid “System”
Together, the thin panels, 1×4 bracing, carpet, and triangular grid create a complete attraction “system” that is quick to set up and take down, gets more pathway per square foot of a square grid and is stronger. The Triangular Grid System stores in a half the space of the more traditional 4″ think panels and is free standing.
What it all comes down to is that the Triangular Grid System is a tool, and like any other tool in the Haunt Designer’s bag of tricks, it can be used when needed… or not. To learn How-To use the Triangular Grid System CLICK HERE
Leonard Pickel is Owner of Hauntrepreneurs(R), a Dark Design and Consulting Firm, Founder of Haunted Attraction Magazine, Owner and Creator of the Haunted Attraction National Tradeshow and Convention, (HAuNTcon), Partner of Findahaunt.com Haunted Attraction locater. Leonard is available for consulting, Haunt design, permit drawings and lectures, (like the one above). Contact him at 972-951-5100 or via email at hauntcon@gmail.com
